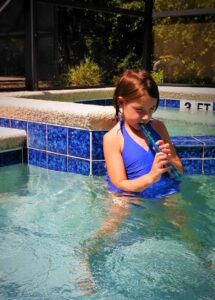
Music plays a very positive role in your child’s development, whether it is through listening to music, singing songs, or playing an instrument. In the first grade, Oak Meadow offers an introduction to the soprano recorder as a musical instrument to play, along with additional, more advanced tutelage offered up through the fourth grade.
The first grade curriculum introduces the recorder with the Beginning Recorder course book; the second grade curriculum follows up with Intermediate Recorder; the third grade curriculum offers advanced lessons in the Advanced Recorder course book; and the fourth grade curriculum completes the recorder coursework with Recorder Duets.
 The recorder is a very old European instrument that dates all the way back to the 14th century, possibly originating in Italy. It’s an appealing and appropriate modern-day instrument for young children who are just beginning to unfold their musical abilities and potential. The recorder is also a simple and versatile instrument to learn that allows the player to practice attention and focus, to help train and develop the ear, and to further aid in reading and composing musical notation.
If you, as the home teacher, are also new to playing the recorder and feel that a guided tutorial would benefit you in teaching your child to play this instrument, I suggest watching the Recorder Basics – B A G video. The instructor in the video, Mr. Barnes, demonstrates how to hold the recorder, as well as how to play “Hot Cross Buns” with the notes B, A and G. “Hot Cross Buns” is one of the first songs introduced in Oak Meadow’s Beginning Recorder guidebook.
If your child is more advanced in playing the recorder and has already worked through all the songs in the recorder books offered in the Oak Meadow coursework, Woodstock Chimes provides a lengthy list of familiar songs to play on the recorder. Each song includes its own fingering chart, as well as words to the songs for additional singing pleasure.
As a collaborative effort, Oak Meadow’s staff offered some additional tips on how to play the recorder:
Sarah Antel
One of the things that stuck with me from music lessons as a child was belly breathing. You can stand in front of a mirror to practice breathing. Additionally, it helps if you stand sideways so you can see your belly go in and out. You should take a deep breath through your nose and imagine you are filling a balloon in your belly and focus on filling your belly with air rather than making your chest rise. In a similar fashion, when releasing air, or breathing out, exhale through the mouth. You should focus on squeezing all of the air out using your stomach. Your chest should not be moving at all. Looking sideways in the mirror, you will see your stomach pull in. This type of breathing allows you to take a deeper breath and have a stronger sound when playing.
Lesley Arnold
Instruct your child to sit up tall (with a straight back) and toward the edge of the seat in order to take full breaths. After finding the right breath for blowing into the recorder, have your child try to imagine gently blowing on a candle flame just so it flickers, but doesn’t go out. The fingers should be curved and relaxed completely covering the holes. The left hand should always be on top! Have your child press firmly to seal the finger holes completely. Lips should cover the teeth lightly. Make sure your child separates the notes by touching the tip of the tongue to the roof of the mouth or to the tip of the recorder. Clap and count the rhythm, speak, then sing the name of the notes. Then the tune is ready to be played.
We encourage you to bring music into your home and your child’s life in a variety of experiential ways, and enjoy together the harmony it brings! You can find more instruction on playing the recorder in Oak Meadow’s Guide to Teaching the Early Grades as well as throughout our K-4 curriculum.